Updated about 12 years ago by 
Using Git for GammaLib development
Prerequisits
GammaLib uses Git for version control. To contribute to the GammaLib source development, you need Git installed on your machine (which is likely already the case). Before using Git, make sure that your user name and e-mail address is correctly configured. This is best done globally using the commands
$ git config --global user.name "Joe Public"
$ git config --global user.email "joe.public@gmail.com"
Please make sure that you specify your full name as user.name, do not use your abbreviated login name because this makes code modification tracking more cryptic.
The GammaLib source code will be accessed using the https protocol, which makes use of SSL certificates. To disable certificate verification, we recommend to issue the command
$ git config --global http.sslverify "false"
which disables certificate verification globally for your installation.
Cloning the GammaLib source code
To clone the GammaLib source code, type
$ git clone https://cta-git.irap.omp.eu/gammalib
This will create a directory called gammalib under the current working directory that will contain the GammaLib source code. Note that the default branch from which you should start for software developments is the devel branch, and the git clone command will automatically clone this branch from the central repository. Make sure that you will never use the master branch to start your software developments, as pushing to the master branch is not permitted. The master branch always contains the code of the last GammaLib release, and serves as seed for hotfixes.
Contributing source code
The general policy for adding or modifying source code is the creation of a new branch. Suppose you want to create a new feature for GammaLib. In this case, you would issue the command
$ git checkout -b my_new_feature
to create a new branch called my_new_feature. Now you can develop the code, compile and check. Before a first compilation, you need to create the relevant autotools files. This is done by typing
$ ./autogen.sh
in the GammaLib directory. Now you can configure, compile and check using
$ ./configure
$ make
$ make check
Suppose that you modified the file src/app/GApplication.cpp in creating your new feature. After testing your modification, you will issue the commands
$ git add src/app/GApplication.cpp
$ git commit -m "I added a very nice feature to GammaLib."
to commit your changes. If you omit the -m "I added a very nice feature to GammaLib." part, a vi editor will open to allow you entering a more comprehensive message. Please make sure that your commit message is as meaningful as possible. Describe any developments and changes in detail, and link to the relevant issue by specifying the issue number in the form #nnn, for example: -m "I added a very nice feature to GammaLib that solves the change request #199."
Merging code into the central repository
To merge your changes into the central code repository you have to type the following sequence of commands:
$ git checkout devel
$ git pull
$ git merge my_new_feature
$ git push https://user@cta-git.irap.omp.eu/gammalib
The first command will switch your git repository back to the devel branch into which you should merge your new feature. As second command, you should issue the git pull command to make sure that you have the latest version of the GammaLib code in your repository (in case that somebody else has made some modifications since your initial cloning).
The third command will merge your new feature into the development branch. At this stage you have to resolve any code conflicts that may arise from the merging. After merging, and in particular after resolving any code conflicts, test your new feature comprehensively.
Now you’re ready to issue the forth command that will push your new feature back to the central repository. Here, user is your user name on the CTA collaborative platform at IRAP (the same you used to connect for reading this text). Executing this command will open a window that asks for a password (your password on the CTA collaborative platform at IRAP), and after confirming the password, your change will be pushed to the repository.
Typing your password in the window can be avoided by directly specifying the password in the push command:
$ git push https://user:password@cta-git.irap.omp.eu/gammalib
If you want to avoid typing your user name and password every time you make a push, you can create a file called .netrc under your root directory (i.e. ~/.netrc) with the following content:
machine cta-git.irap.omp.eu
  login <user>
  password <password>
(replace <user> and <password> by your user name and password). Once the .netrc file in place, you may simply type
$ git push
to push you code changes into the repository.
Deleting your obsolete branch
Finally, you may delete the obsolete feature branch by typing
$ git branch -d my_new_feature
Using SmartGit
Quick guide
A nice GUI for handling the GammaLib Git repository is SmartGit (http://www.syntevo.com/smartgit/index.html). This avoids learning all the various Git commands, but requires of course some understanding about how SmartGit works. SmartGit runs on Windows, Mac OS X and Linux.
To configure SmartGit after installation, select Project->Clone... from the menu and configure the repository as follows:
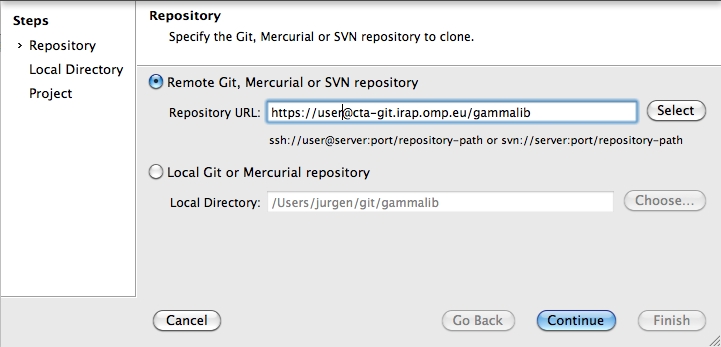
In this example, the user is user. Please replace this field by your own user. After pressing Continue you have to select the repository type:
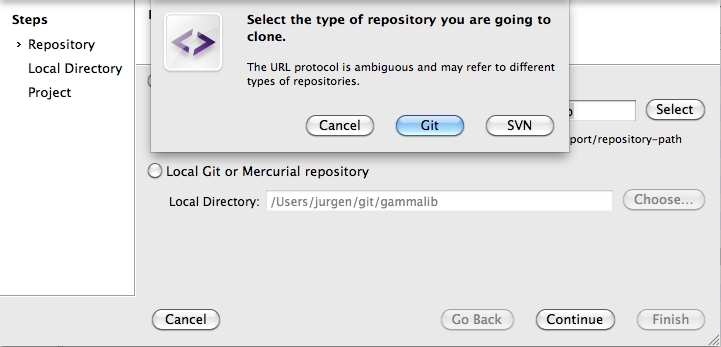
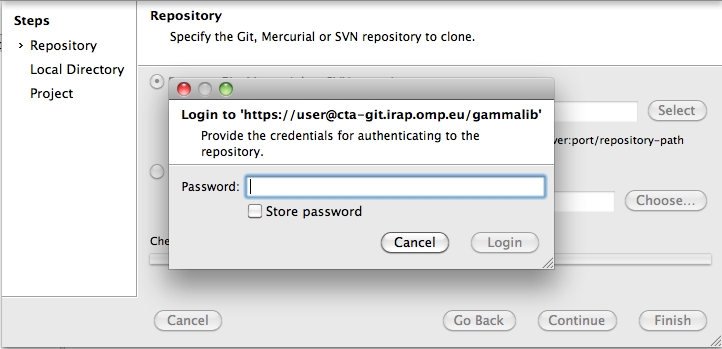
Press Git here. You will then be asked for you password. If you check the box before Store password, SmartGit will take care of storing your password, and you never have to type it again to interact with the GammaLib Git repository.
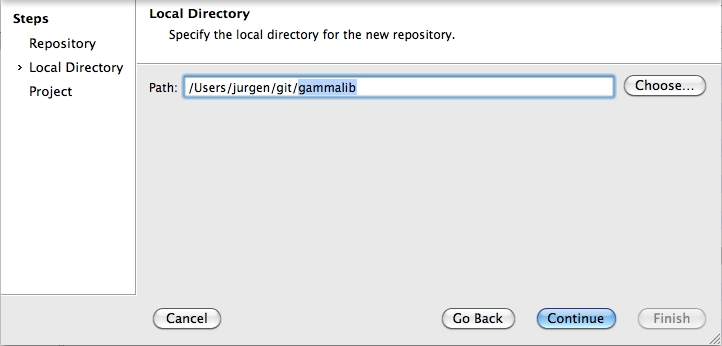
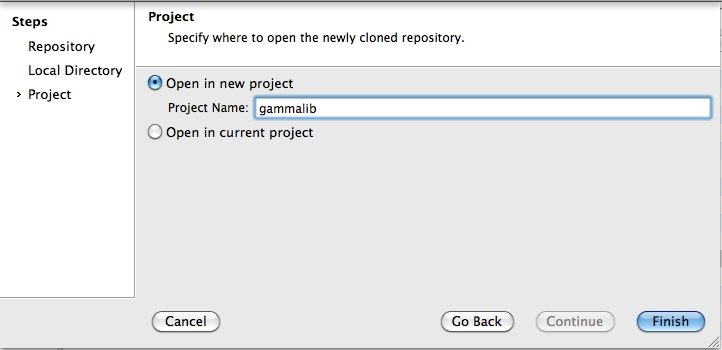
Once logged in you have to specify where the local copy of the Git repository will reside on your disk. Please specify an absolute file path here:

Finally you have to specify a project name and you’re done !
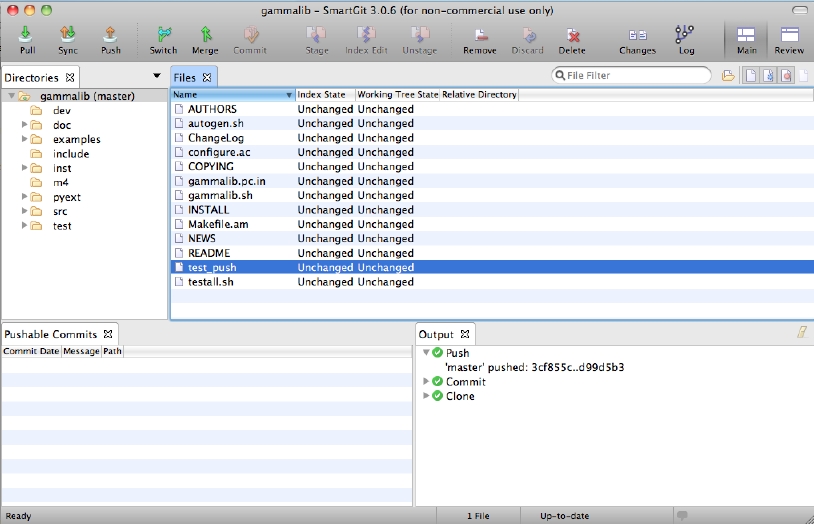
Below a typical view of how the GammaLib repository will be presented by SmartGit (note that the specific directory names and file content will differ in your view):
In case of access problems related to the SSL certificate, make sure you have issued the command
git config --global http.sslverify "false"
in a terminal before. This disables certificate verification globally for your Git installation.
Hints
SmartGit keeps track of everything in a log file nameslog.txt. You may find this log file in the following directories:
- Windows: APPDATA\syntevo\SmartGit\<major-SmartGit-version> (APPDATA is the path defined in the environment variable APPDATA)
- Mac OS: ~/Library/Preferences/SmartGit/<major-SmartGit-version>
- Linux/Unix: ~/.smartgit/<major-SmartGit-version>
smart-git-step1.jpg (94.5 KB)
smart-git-step2.jpg (84.7 KB)
smart-git-step3.jpg (98.8 KB)
smart-git-step4.jpg (58.1 KB)
smart-git-step5.jpg (63.1 KB)
smart-git-navigator.jpg (207 KB)